
Planting
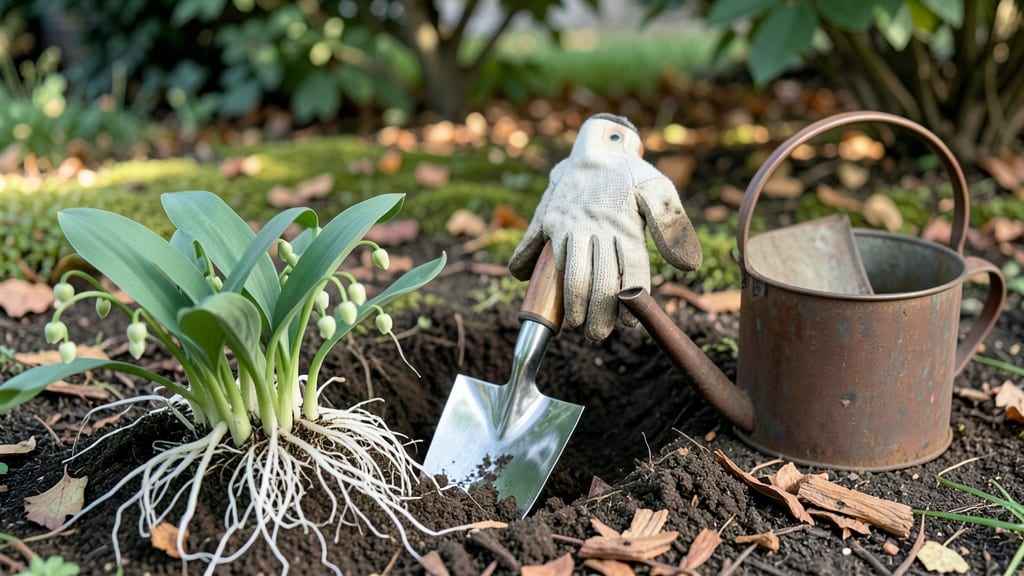
Planting lily of the valley roots transforms shady corners into fragrant gardens that return year after year. 🌿 The secret lies in mimicking their natural woodland habitat—moist, well-drained soil under dappled light.
My first attempt nearly failed when I planted too deep, but once I learned the right depth and spacing, these perennials spread effortlessly, filling gaps with delicate white blooms by spring.
You’ll need a shady spot (they tolerate full shade), a fork or trowel, and rhizomes—those thick, fleshy roots that look like tiny snakes. Plant them in early fall or spring, spacing them 6-8 inches apart and 2-3 inches deep, with the pointed end facing up.
The soil should stay consistently moist but never soggy, which is why mulching helps retain moisture and suppress weeds.
By next spring, you’ll see those iconic bell-shaped flowers nodding in the breeze, their sweet scent lingering like a secret. The plants spread slowly but steadily, creating lush colonies over time. Just avoid overcrowding—divide clumps every 3-4 years to keep them vigorous and blooming.
Common mistakes include planting too deep (roots rot) or too shallow (they dry out). If your spot gets hot afternoon sun, provide afternoon shade to prevent leaf scorch. With the right care, these shade-loving perennials will reward you for decades—minimal effort, maximum fragrance.
📚 In This Guide
- What you need
- Instructions
- Tips and common mistakes
- Wrapping up and next steps
What you need
- ● Lily of the Valley Roots: Healthy, dormant roots (preferably with at least 2-3 buds per rhizome). Aim for 2-3 pounds per 100 square feet of garden space.
- ● Garden Soil: Well-draining, loamy soil with a pH of 6.0-7.0. Amend heavy clay or sandy soil with 2-3 inches of compost or peat moss.
- ● Organic Mulch: 2-3 inches of shredded bark, wood chips, or straw to retain moisture and suppress weeds.
- ● Garden Gloves: A sturdy pair to protect your hands from sharp soil and roots.
- ● Hand Trowel or Transplant Spade: For digging and placing roots gently into the soil.
- ● Watering Can or Hose with a Gentle Spray Nozzle: To keep the soil moist (but not soggy) during planting and establishment.
- ○ Fertilizer (Optional but Recommended): A balanced, slow-release granular fertilizer (e.g., 10-10-10) or an organic option like composted manure or worm castings.
- ● Apply 1-2 tablespoons per plant at planting time.
- ● Soil pH Test Kit: To double-check your soil’s acidity before planting.
- ● Planting Grid or String: For marking rows and ensuring even spacing (6-12 inches apart).
- ● Slow-Release Fertilizer Tablets: For a hassle-free nutrient boost over time.
- ● Epsom Salt (Magnesium Sulfate): A 1 tablespoon per gallon of water spray can boost root health if your soil is deficient.
- ● Shade Cloth (Temporary): If planting in hot climates, use 30-50% shade cloth for the first few weeks to reduce stress.
Step-by-step guide to planting lily of the valley roots
Here's how to establish these fragrant perennials with minimal fuss—just follow these simple steps.
🌱 Step 1: Choose the Right Location and Prepare the Soil
Lily of the valley thrives in partial to full shade, with morning sun at most. Pick a spot where it gets 3-6 hours of indirect light daily—too much sun scorches the leaves. The soil should drain well but stay consistently moist, so avoid low spots where water pools.
Loosen the soil to a depth of 12 inches with a garden fork or tiller. Work in 2-3 inches of compost or well-rotted leaf mold to improve fertility and drainage. Lily of the valley prefers slightly acidic to neutral soil (pH 6.0-7.0), so test your soil if you're unsure—amend with sulfur if needed.
🌱 Step 2: Divide and Plant the Roots
Separate the roots into small clusters of 3-5 buds each—each cluster will become one plant. Handle the roots gently; they're delicate and bruise easily. Plant them 12-18 inches apart in rows 18-24 inches apart to give them room to spread naturally over time.
Dig holes 2-3 inches deep—deeper planting can delay flowering. Place each root cluster in the hole with the buds facing upward (they'll look like tiny bulbs or swollen nodes). Cover lightly with soil, then water deeply to settle everything in place. You'll see new growth within 2-3 weeks if conditions are right.
💧 Step 3: Mulch and Water for Establishment
Spread a 2-3 inch layer of mulch (shredded bark or leaves work best) around the plants to retain moisture and suppress weeds. Keep the mulch 2 inches away from the stems to prevent rot. Water 1-2 times per week during the first growing season, ensuring the soil stays evenly moist but not soggy—lily of the valley roots rot quickly in waterlogged conditions.
After the first year, the plants will be well-established and more drought-tolerant. You'll know they're happy when they produce long, arching stems with clusters of bell-shaped flowers in late spring. The fragrance is unmistakable—sweet and heady, perfect for shady garden corners.
✂️ Step 4: Maintain and Divide as Needed
Once established, lily of the valley needs minimal care. Remove spent flower stems in early summer to encourage more blooms, but leave the foliage until it yellows naturally—this feeds the roots for next year's growth. Fertilize lightly in early spring with a balanced, slow-release fertilizer (10-10-10) if your soil is poor.
Every 3-4 years, dig up the roots in early spring or fall and divide them to keep the plants vigorous. Replant the divisions immediately in fresh soil. You'll notice the plants spread aggressively over time—this is normal and part of their charm. Just keep an eye on their growth and thin them out if they crowd too much.
Tips & tricks for planting lily of the valley roots
These simple strategies will help you establish fragrant, thriving lily of the valley with confidence.
Location is Everything: When selecting your planting spot, prioritize areas with dappled shade from trees or shrubs. I've learned the hard way that afternoon sun can scorch the delicate leaves—look for spots where the sun only hits in the morning hours. If your yard has limited shade, consider planting near a north-facing wall or under deciduous trees that provide seasonal shade. The 3-6 hours of indirect light mentioned in the instructions is ideal, but morning sun is absolutely critical.
Root Handling Matters: Lily of the valley roots are surprisingly delicate, so handle them with care when dividing. I always lay a towel on my work surface to prevent bruising, and I use a clean knife to separate the clusters. Those 3-5 bud clusters are what will grow into new plants, so make sure each one has at least one healthy bud. Planting them immediately after dividing (rather than letting them dry out) gives you the best chance of seeing new growth within that 2-3 week window mentioned in the instructions.
Soil Preparation Secret: The 2-3 inches of compost you're adding to your 12-inch deep soil preparation is non-negotiable for these plants. I like to mix in a bit of perlite to improve drainage while maintaining that moisture-retentive quality. For the pH test, don't stress about perfect numbers—just aim for that 6.0-7.0 range. If your soil is too alkaline, a sprinkle of sulfur in the planting hole will help adjust it without major amendments.
Watering Wisdom: That 1-2 times per week watering schedule during establishment is perfect, but timing matters just as much. Water in the morning so the foliage has time to dry before evening. I've found that using a soaker hose or drip irrigation system prevents soil compaction and delivers water right to the roots where it's needed most. Overwatering is the fastest way to kill these plants—always check that the soil stays evenly moist but never soggy.
Pro Tips for Plant Lily Of The Valley Roots
- These simple strategies will help you establish fragrant, thriving lily of the valley with confidence.
- Location is Everything: When selecting your planting spot, prioritize areas with dappled shade from trees or shrubs. ...
- Root Handling Matters: Lily of the valley roots are surprisingly delicate, so handle them with care when dividing. I ...
Frequently asked questions
Got questions about planting lily of the valley roots? You’re not alone—this fragrant perennial has a few quirks! Here are answers to the most common concerns to help you grow with confidence.
Can I plant lily of the valley roots in summer?
It’s best to plant in early spring or fall when soil temps are cool (50–60°F). Summer heat can stress roots, leading to poor establishment. If you must plant in summer, water deeply 2–3 times a week and mulch to retain moisture. Roots planted in extreme heat may take longer to bloom.
Why aren’t my lily of the valley roots sprouting?
Patience is key—roots can take 2–3 weeks to show signs of growth. Check these troubleshooting steps:
- Soil depth: Ensure roots are planted 1–2 inches deep (not buried too shallow or deep).
- Temperature: Soil should be cool (below 65°F). Wait for ideal conditions.
- Moisture: Keep soil consistently damp (not soggy). Drought stress can delay sprouting.
- Pests: Inspect for slugs or rodents—these love young shoots!
Can I divide lily of the valley roots for faster spread?
Divide clumps in early spring or fall when the plant is dormant. Gently separate rhizomes (each should have 1–2 buds) and replant immediately. Space divisions 6–12 inches apart. Avoid dividing in summer—heat stress can kill new sections.
Are lily of the valley roots invasive in my garden?
They can spread aggressively in ideal conditions (shade, moist soil). To control growth:
- Edge plantings: Use containers or bury pots in the ground to limit spreading.
- Selective pruning: Trim foliage after flowering to reduce seed production (though roots spread mostly underground).
- Regular division: Lift and divide clumps every 3–4 years to prevent overcrowding.
What’s the best alternative if I can’t grow lily of the valley?
If your climate is too dry or hot, try these fragrant, shade-tolerant alternatives:
Plant
Why It Works
Bleeding Heart (Dicentra spectabilis)
Delicate pink/white flowers; thrives in partial shade and moist soil.
Solomon’s Seal (Polygonatum spp.)
Arching stems with dangling blooms; drought-tolerant once established.
Hosta (Hosta spp.)
Low-maintenance foliage; great for deep shade (though not fragrant).
Wrapping up and next steps
Planting lily of the valley roots is a rewarding way to bring fragrant beauty to your shade garden—just follow the right steps! With well-prepared soil, proper spacing, and a little patience, these hardy perennials will thrive and reward you with years of delicate blooms.
Whether you’re a beginner or a seasoned gardener, the key is consistency: water gently, mulch well, and let nature do the rest.
Now that you’re ready to plant, take the next step! Mark your calendar for late fall or early spring planting, and keep an eye out for those telltale white bell-shaped flowers as your hard work pays off. Happy gardening—your future fragrant garden awaits! 🌿✨