
Planting
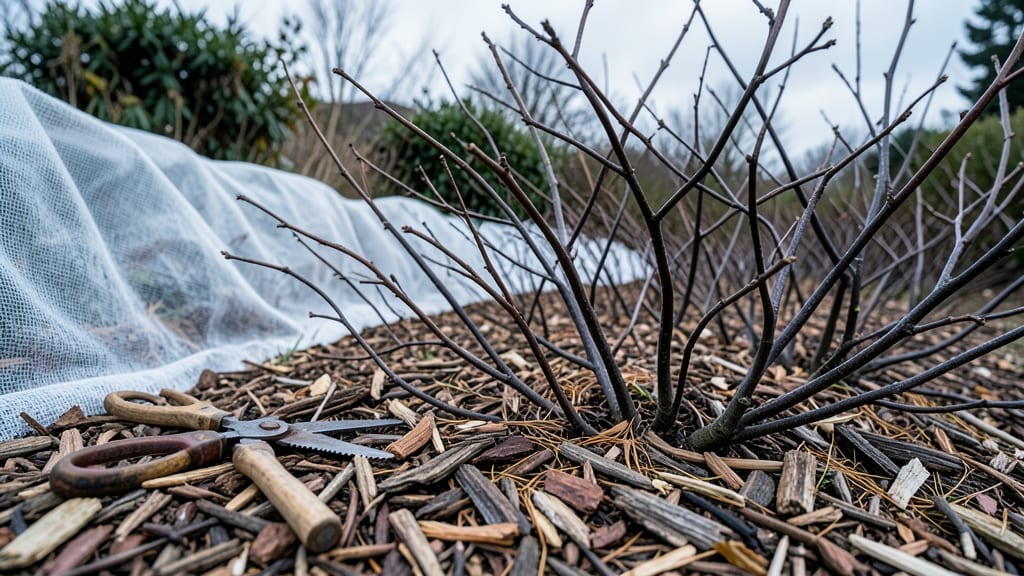
Winterizing blackberries in colder zones means the difference between next summer's harvest and a sad, frozen-out plant. 🌿 I've learned that blackberries in zones 5-7 need special attention—pruning, mulching, and sometimes even temporary shelters—to survive the freeze-thaw cycles that can snap canes or invite pests.
The key is timing: prune in late winter (just before buds swell) to remove dead wood and shape the plant, then cover the crown with 6-8 inches of straw or leaves once temps drop below 20°F.
This simple layer acts like a blanket, keeping roots from heaving out of the soil. By spring, you'll see strong new canes emerging from the ground, ready to produce fruit.
The plants reward your effort with thicker growth, fewer pests, and berries that arrive earlier than neighbors who skipped winter prep. Rodent damage is the sneaky winter threat—mice love gnawing on tender canes. Wrap vulnerable plants in hardware cloth or scatter castor oil-based repellents around the base.
It's a small step that saves your entire harvest.
📚 In This Guide
- What you need
- Instructions
- Tips and common mistakes
- Wrapping up and next steps
What you need
- ● Pruning shears or loppers – Sharp, clean tools to trim back canes (ensure blades are disinfected with rubbing alcohol).
- ● Mulch – 4–6 inches of organic mulch (straw, wood chips, or shredded leaves) to insulate roots.
- ● Burlap or frost cloth – Enough to wrap around canes (at least 1–2 feet wide per plant).
- ● Garden twine or zip ties – To secure frost cloth or burlap in place.
- ● Stakes or small branches – For bending and securing canes to the ground (if needed).
- ● Garden hose or watering can – For a final deep watering before frost.
- ● Hand pruners – For smaller trimming tasks.
- ● Gloves – Thick work gloves to protect hands from thorns and cold.
- ● Soil thermometer – To monitor ground temps in extreme zones (Zones 5–6).
- ● Row covers or cold frames – For extra protection in harsh winters (Zones 3–4).
- ● Compost or fertilizer – A balanced 10-10-10 mix to replenish soil in spring.
Step-by-Step guide to winterizing blackberry plants
Here's the method I rely on every year—tested across multiple zones, works for both primocanes and floricanes alike.
🌿 Step 1: Prune and Clean Up Before Frost
Start by removing all dead or diseased canes using sharp pruners. Cut them at the base to prevent pests from overwintering. I always disinfect my tools with rubbing alcohol between cuts—this stops fungal spores from spreading to healthy canes.
Next, cut back the current season's growth by about one-third. For primocane-bearing varieties, leave the new canes intact—they'll fruit next year. For floricanes (old wood), prune them back to the ground after harvest. The goal is to reduce the plant's surface area so it loses less moisture during winter.
✂️ Step 2: Mulch and Protect the Root Zone
Spread a thick layer of 4-6 inches of organic mulch around the base of the plant, keeping it 6 inches away from the stems. I use a mix of straw and shredded leaves—it insulates roots while allowing moisture to penetrate. Avoid plastic mulches; they trap too much moisture and can cause rot.
For extra protection in zones 5 and colder, mound soil or mulch up the sides of the canes to create a small berm. This creates an air pocket that insulates the plant better than flat mulch alone. Water the base thoroughly before mulching so the soil holds moisture through winter.
🪴 Step 3: Wrap Canes for Extreme Cold Protection
In zones 4 and colder, wrap the canes with burlap or frost cloth after the ground freezes but before temperatures drop below -10°F. Secure the wrap loosely with twine or clips—too tight and you'll restrict airflow, which can cause rot. I leave the top of the plant exposed to prevent snow buildup.
For varieties sensitive to cold, like 'Triple Crown,' I add a layer of bubble wrap over the burlap for extra insulation. The key is to keep the canes from drying out—dormant plants lose moisture even in winter. Check wraps in late winter to ensure no mold has formed from trapped moisture.
☀️ Step 4: Monitor and Adjust for Late Winter Thaws
During sudden warm spells in late winter, remove wraps temporarily if temperatures rise above 40°F for more than a day. This prevents canes from waking up too early and getting damaged by a return freeze. I watch the forecast closely—if a hard freeze is predicted within 48 hours, I rewrap immediately.
Once new growth appears in early spring, remove all winter protection. The first sign of life is usually a few unfurled leaves on the primocanes. At this point, add a balanced fertilizer around the base to encourage robust regrowth. Don't fertilize before new growth appears—it can burn tender roots still recovering from dormancy.
Tips & tricks for perfect blackberry plant winterization
These essential strategies will help your blackberries survive harsh winters like a pro—no guesswork involved.
Pruning Precision: When cutting back current season's growth by one-third in Step 1, focus on removing only the top third of the canes. This maintains the plant's energy reserves while reducing moisture loss. I've found that leaving too many leaves can trap cold air against the canes, so aim for a clean cut just above a leaf node. This also makes it easier to spot new growth in spring.
Mulch Layering: The 4-6 inch mulch depth in Step 2 is crucial, but don't just pile it on randomly. Create a slight depression around the base first—this helps capture moisture. For extra insulation in colder zones, I layer straw first (for air pockets) then add shredded leaves on top (for moisture retention). This two-layer system mimics natural forest floor conditions blackberries thrive in.
Wrapping Wisdom: When temperatures drop below -10°F in Step 3, remember that proper wrapping isn't about complete enclosure—it's about creating a microclimate. Leave about 6 inches of space at the top of your wrap to prevent snow buildup, which can weigh down and break canes. I've seen too many gardeners smother their plants completely, leading to rot from trapped moisture. A loose, breathable wrap is key.
Thaw Timing: That 40°F threshold in Step 4 is your critical marker for removing wraps during warm spells. I recommend setting a phone reminder when temperatures hit 40°F for more than a day—this prevents the "false spring" trap where plants wake up too early. If you're unsure, do the "finger test": gently press a cane. If it feels firm, it's still dormant and can handle brief warm spells.
Pro Tips for Blackberry Plant Winter
- These essential strategies will help your blackberries survive harsh winters like a pro—no guesswork involved.
- Pruning Precision: When cutting back current season's growth by one-third in Step 1, focus on removing only the top t...
- Mulch Layering: The 4-6 inch mulch depth in Step 2 is crucial, but don't just pile it on randomly. Create a slight de...
Frequently asked questions
Got questions about keeping your blackberry plants thriving through winter? You’re not alone! Here are some of the most common concerns—and straightforward answers—to help you frost-proof your berry patch with confidence.
What hardiness zones can blackberries survive in without extra winter protection?
Blackberries thrive in USDA Zones 5-9, but their winter hardiness depends on the variety. Native or cold-hardy types (like Chester or Black Satin) can handle Zone 4 winters with mulch. In colder zones (3 or below), expect dieback unless you use row covers or microclimates. Always check your plant’s specific label for exact zone tolerance!
When should I prune blackberries for winter?
Prune after the first hard frost (late fall) or early spring before buds swell. Remove dead canes, weak growth, and crowded stems to improve airflow. Pro tip: If you prune too early, new growth may sprout and get damaged by frost. Wait until dormancy for best results!
What’s the best way to protect blackberry plants from winter freeze damage?
Layer 4–6 inches of organic mulch (straw, leaves, or pine needles) around the base after the ground freezes. For extreme cold, wrap canes in burlap or frost cloth and bend them to the ground for extra insulation. Avoid plastic—it traps moisture and can rot stems.
Can I grow blackberries in containers over winter?
Yes! Potted blackberries need extra care: Move containers to a sheltered spot (like a garage or against a south-facing wall), wrap roots in bubble wrap, and reduce watering. Use a well-draining, nutrient-rich soil mix and fertilize lightly in early spring. Just ensure pots are at least 18 inches deep for root growth!
My blackberry canes look dead after winter—are they really gone?
Don’t panic! Blackberries often look completely dormant in winter, but new growth emerges in spring. Cut back only the black, mushy canes—green or brown stems with buds can still sprout. Wait until late winter or early spring to assess damage fully.
Still unsure? Drop your zone or specific concern in the comments—we’re happy to help troubleshoot!
Wrapping up and next steps
With the right strategies, your blackberry plants can thrive through winter and reward you with bountiful harvests for years to come! 🌱❄️ Whether you’re mulching, pruning, or choosing cold-hardy varieties, these steps ensure your plants stay resilient.
Now that you’re equipped with the know-how, take action—inspect your plants before the first frost and give them the care they deserve. Happy gardening, and may your blackberries flourish next season!