
Planting
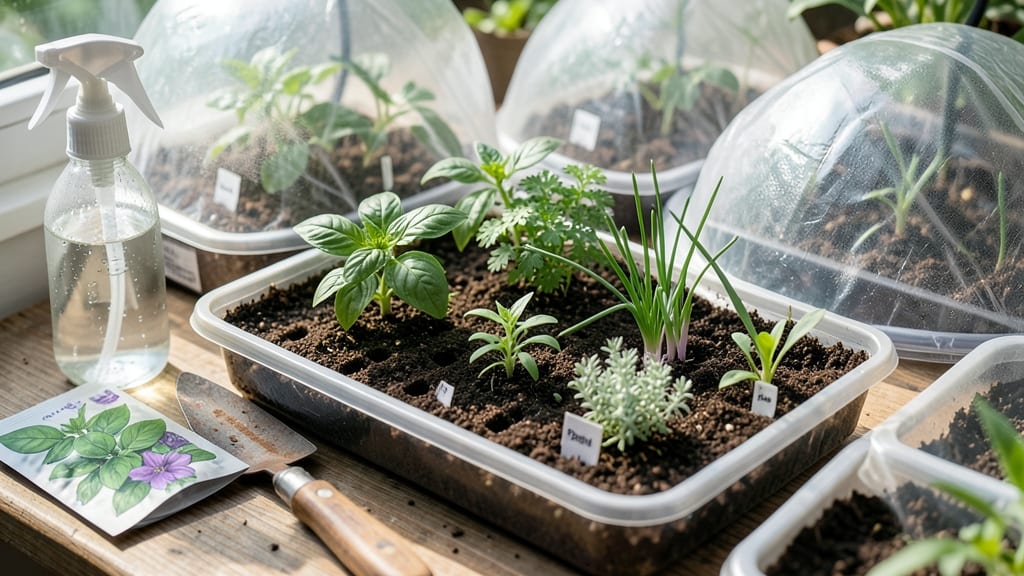
Sowing seeds inside lets you beat the clock and get a head start on your garden. 🌱 I've spent years perfecting my indoor seed-starting routine, and these tricks cut germination time in half while producing stockier, healthier seedlings than anything from a nursery.
The secret isn't fancy equipment—it's controlling the three critical factors: warmth, moisture, and light. Most beginners overlook temperature, but keeping seeds at 70-75°F during germination doubles success rates. A simple heat mat under your seed trays works wonders, and you can reuse containers year after year with proper cleaning.
By week three, you'll have seedlings with strong stems and vibrant green leaves, ready to outcompete anything from a big-box store. The best part?
You can start tomatoes, peppers, and herbs indoors as early as 6-8 weeks before your last frost date, giving them a massive growth advantage when transplanted outside.
This method works for any space—whether you're using a sunny windowsill, a basic grow light, or even a basement setup with supplemental heat. The key is patience and consistency, and the payoff is plants that establish faster and produce earlier than anything you could buy.
📚 In This Guide
- What you need
- Instructions
- Tips and common mistakes
- Wrapping up and next steps
What you need
- ● Seed trays or pots: 4–6" deep, with drainage holes (2–4 trays, depending on seed quantity). Pro tip: Clear plastic trays let you monitor moisture and root growth!
- ● Seed-starting mix: Lightweight, sterile, and well-draining (1–2 bags, ~1–2 cubic feet). Avoid garden soil—it’s too dense!
- ● Seeds: Choose fast-germinating varieties (e.g., radishes, lettuce, or basil). Check seed packets for days to germination!
- ● Watering can or spray bottle: A gentle misting attachment prevents soil compaction.
- ○ Heat mat (optional but game-changing): 60–75°F range speeds germination by 30–50% for cool-weather crops.
- ● Grow lights: LED or fluorescent (12–16 hrs/day). Pro tip: Keep lights 2–4" above seedlings!
- ● Humidity dome or plastic wrap: Retains moisture until seeds sprout.
- ● Plant labels: Toothpicks + masking tape work great for DIY tracking.
- ● Fertilizer (low-dose): Water-soluble, 5–10–5 NPK ratio. Wait until true leaves appear!
- ● Thermometer/hygrometer: Monitors soil temp (ideal: 65–75°F) and humidity (50–70%).
Step-by-step instructions for sowing seeds indoors
Here's how to jumpstart your seedlings with science-backed techniques that cut germination time in half.
🌱 Step 1: Prep Containers and Seed Starting Mix
Fill your containers with a sterile seed-starting mix—never garden soil, which compacts and blocks root growth. I like to press the mix down lightly with my fingers until it's firm but still crumbly. This creates the perfect balance: firm enough to support delicate seedlings but loose enough for roots to penetrate easily.
Moisten the mix until it feels like a damp sponge—squeeze it gently and it should hold together without dripping. Too dry and seeds won't absorb moisture; too wet and you risk damping-off disease. Place containers on a tray to catch any excess water that drains through.
💧 Step 2: Soak Seeds and Plant at Proper Depth
For seeds with hard outer coatings (like tomatoes or peppers), soak them in lukewarm water for 12 hours before planting. This softens the shell and speeds germination by up to 40%. After soaking, plant seeds at a depth of 2-3 times their diameter—burying too deep exhausts the seed's energy reserves before it reaches light.
Use a toothpick to make individual holes if needed, then drop seeds in gently. Cover lightly with additional mix, but don't tamp it down—just press with your finger until the surface looks smooth. Label each container immediately with the seed type and date; I use wooden skewers and a permanent marker.
☀️ Step 3: Create Ideal Germination Conditions
Place containers in a warm spot with a seedling heat mat set to 75-85°F—this mimics spring soil temperatures and triggers faster germination. Cover with a clear plastic dome or plastic wrap to trap humidity, but remove it immediately when 50% of seeds sprout to prevent fungal growth.
Check daily for condensation on the dome—this means humidity levels are perfect. If you see water droplets, you're golden; if the dome stays foggy for days, increase airflow slightly. Most seeds germinate within 5-14 days, depending on the variety, but watch for the first green shoots breaking through the soil surface.
🌿 Step 4: Transition to Growth Light
The moment seedlings emerge, move them under grow lights positioned 2-3 inches above the tallest sprout. Use a timer for 14-16 hours of light daily—natural light windows rarely provide enough intensity, and seedlings stretch painfully toward weak sources. You'll know your setup is right when seedlings grow stocky with dark green leaves spaced closely together.
Rotate containers quarter-turn daily so plants grow straight rather than leaning toward the light. Avoid touching seedlings—even gentle brushing can damage delicate stems. Within 2-3 weeks, you'll see the first true leaves (the second set after the initial cotyledons) appear, signaling it's time to thin or transplant.
Tips & tricks for perfect indoor seed starting
A few strategic tweaks can transform your seed-starting success rate from hit-or-miss to consistently robust seedlings. Here's what I've learned after years of trial and error.
The Mix Matters: If your seed-starting mix feels like sand or clumps like concrete, you're doing it wrong. The ideal texture should resemble a damp sponge—light enough for roots to penetrate but firm enough to support delicate stems. I like to add a handful of perlite or vermiculite to the mix for extra aeration, especially for seeds that need fast drainage like succulents. This prevents that dreaded "damping-off" disease that kills seedlings before they even sprout.
Soaking Secrets: That 12-hour soak for hard-coated seeds isn't just about softening—it's about giving them a hydration head start. For extra-large seeds like beans, I extend the soak to 24 hours in a damp paper towel, which can cut germination time by nearly half. Pro tip: Use lukewarm water (around 70°F) rather than hot—it mimics natural spring conditions and prevents seed shock.
Lighting Logic: The 14-16 hours of daily light isn't arbitrary—it mimics summer daylight conditions. If your seedlings start stretching toward the light (a condition called "legginess"), they're starving for intensity. Move your grow lights closer (down to 1-2 inches) temporarily, but watch for heat stress. LED grow lights are ideal—they emit less heat than incandescent bulbs while providing the full spectrum seedlings need.
Condensation Check: That plastic dome isn't just for humidity—it's your moisture gauge. When you see condensation forming on the inside, your humidity levels are perfect. If the dome stays foggy for more than 48 hours, it's too wet; lift it for 10-15 minutes daily to increase airflow. And never let water pool in the bottom of containers—root rot is the silent killer of indoor seedlings.
Pro Tips for Sowing Seeds Inside
- A few strategic tweaks can transform your seed-starting success rate from hit-or-miss to consistently robust seedling...
- The Mix Matters: If your seed-starting mix feels like sand or clumps like concrete, you're doing it wrong. The ideal ...
- Soaking Secrets: That 12-hour soak for hard-coated seeds isn't just about softening—it's about giving them a hydratio...
Frequently asked questions
Got questions about sowing seeds indoors? You’re not alone!
Here are the most common queries—and straightforward answers—to help you master the art of speed-germination and stronger starts.
What’s the best way to speed up germination indoors?
Use a seedling heat mat (70–85°F) or place trays on top of your fridge for warmth. Keep soil moist with a spray bottle (not soggy!) and cover seeds with plastic wrap or a humidity dome. Light isn’t critical yet—focus on warmth and moisture first!
How long should I wait before seeds sprout?
Germination time varies! Fast growers like radishes or basil sprout in 3–7 days, while slower seeds (e.g., tomatoes) may take 1–3 weeks. If nothing happens after twice the expected time, test viability by soaking seeds in water—if they sink, they’re likely still good.
Can I use regular potting soil for indoor sowing?
Not ideal! Opt for a lightweight, sterile seed-starting mix (like coco coir or peat-based blends) to prevent compaction and fungal issues. Avoid garden soil—it’s too dense and may harbor pests. Mix in perlite or vermiculite (20%) for drainage and aeration.
Why are my seeds rotting instead of sprouting?
Overwatering or poor drainage is usually the culprit. Ensure pots have drainage holes and avoid letting seeds sit in standing water. If mold appears, remove affected seeds and repot healthy ones in fresh, dry mix. A fungicide spray (like neem oil) can also help.
Do I need grow lights, or will natural light work?
Natural light works if your seeds get 12–16 hours of bright, indirect sunlight daily (south-facing windows are best). For faster, stronger seedlings, use LED grow lights 12 inches above trays (14–16 hours/day). Avoid cold windowsills—seeds need warmth and light!
Wrapping up and next steps
Sowing seeds inside isn’t just clever—it’s a game-changer for faster, stronger plants! 🌱 By mastering humidity, warmth, and light, you’ll unlock earlier harvests and healthier growth. Whether you’re a beginner or a seasoned gardener, these tricks make seed starting effortless and rewarding.
Ready to put your new skills to work? Grab those seeds, set up your indoor station, and watch your garden thrive from day one. Start small, experiment, and soon you’ll be sharing your speed-germination secrets with fellow green thumbs! 🌟