
Planting
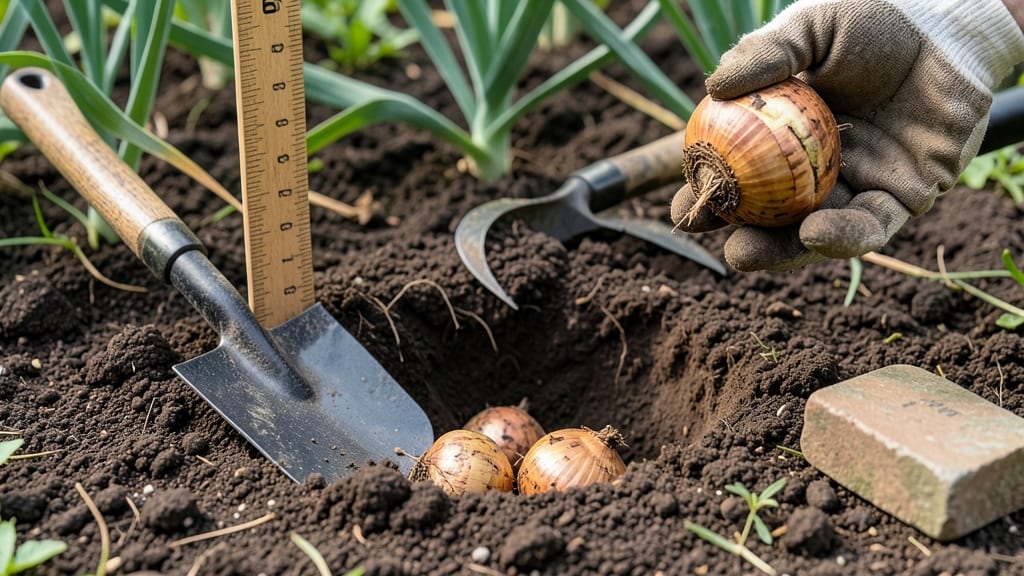
Planting gladiolus bulbs at the right depth—about 4 to 6 inches—is the secret to those dramatic, towering stems 🌸 that make your garden stand out.
Struggling to grow gladiolus with weak stems or poor blooms? The secret lies beneath the soil—planting depth makes all the difference. Get the exact measurements to unlock towering, vibrant gladiolus plants that steal the show in your garden.
Too shallow, and you risk stunted growth or flopping stems. Too deep, and the bulbs may rot before they even sprout. In USDA Zone 6a, timing matters too—planting in April or May after the last frost ensures your gladiolus get the full growing season to thrive.
Below, I’ll break down the inch-by-inch formula for perfect planting depth, plus soil prep tips, spacing tricks, and how to adjust for your climate. By the end, you’ll know exactly how deep to bury those bulbs for stronger stems and showstopping blooms.

How deep to plant gladiolus bulbs: the perfect inch-by-inch formula
Planting gladiolus bulbs at the right depth is the foundation for towering stems and vibrant blooms. Too shallow, and you risk weak stems; too deep, and your bulbs may rot.
The 3x bulb height rule is your golden standard, but soil type and climate tweak this formula. Let’s dig into the exact measurements that transform your garden into a gladiolus paradise.
Gladiolus bulbs (technically called corms) thrive when planted at a depth equal to 3 times their height. For example, a 2-inch corm needs a 6-inch-deep hole.
This spacing ensures roots anchor properly while keeping the top of the corm just below soil level. Visual learners will appreciate how this rule simplifies what can feel like guesswork.
Why depth matters: Proper planting depth prevents stem flopping and rot while encouraging strong root growth. Shallow planting exposes corms to temperature swings, while over-deep planting suffocates them. The 3x rule balances these risks for consistent results.
Soil type adjustments: - Sandy soil: Plant slightly deeper (3.5x bulb height) to retain moisture. - Clay soil: Plant shallower (2.5x bulb height) to prevent waterlogging. - Loamy soil: Stick to the 3x rule—it’s ideal for most climates.
For large gladiolus varieties (like 'Green Star' or 'Picasso'), aim for 6-8 inches deep. These towering beauties need extra support, and deeper planting stabilizes their 4-5 foot stems. Use a trowel to create a clean hole—no rough edges that could damage roots.
Climate-specific tweaks: - Cold climates (USDA 3-5): Plant 1 inch deeper to protect corms from freeze-thaw cycles. - Hot/dry climates (USDA 9-11): Plant 0.5 inch shallower to reduce moisture stress. - Coastal areas: Adjust for well-draining soil to prevent salt buildup near corms.
Pro tip: Use a wooden dowel or measuring stick to mark planting depth. Press the corm into the hole with the pointy end up—this ensures proper orientation for upward growth. A light layer of compost at the bottom improves drainage without smothering roots.
After planting, water deeply to settle soil around the corm. Avoid overwatering, as soggy soil invites rot. Mulch with 2 inches of straw to regulate soil temperature and retain moisture. In hot climates, mulch also shields corms from extreme heat.
Monitor your gladiolus for uneven stems—a sign of inconsistent planting depth. If stems lean, gently firm soil around the base. For container gardening, use a deep pot (at least 12 inches) and follow the same 3x rule. Drainage holes are non-negotiable to prevent waterlogged corms.
Remember: Perfect depth isn’t about precision tools—it’s about understanding your soil and climate. With these guidelines, your gladiolus will reward you with bold blooms and sturdy stems that reach for the sky. Happy planting! 🌸
Common gladiolus planting mistakes that stunt growth (and how to fix them)
If your gladiolus plants are producing weak stems or sparse blooms, the issue might start below the soil surface. Incorrect planting depth is one of the most overlooked factors that can stunt growth. Too shallow, and your bulbs won’t anchor properly; too deep, and they’ll struggle to reach sunlight.
Let’s diagnose the most common mistakes and how to correct them to get those towering gladiolus stems you’re dreaming of.
First, I’ll admit—even experienced gardeners sometimes rush planting and make these errors. The good news? Fixing them is straightforward once you know what to watch for. Start by checking your planting depth against the 3x bulb height rule.
For most gladiolus corms, that means planting them 6 inches deep. But if your plants still look lackluster, let’s dig deeper into the specifics.
⚠️ Warning: Too Shallow or Too Deep?
Symptoms: Uneven stems, weak foliage, or bulbs rotting before blooming.
Quick Fix: Dig up bulbs and replant at 6 inches deep (or 3x bulb height). For sandy soil, go 4-5 inches; for clay, 6-7 inches.
Pro Tip: Use a ruler or marker on your trowel to ensure consistency.
One of the biggest mistakes is planting gladiolus bulbs too shallow. When bulbs sit too close to the surface, they can dry out or be exposed to temperature fluctuations. This often leads to uneven stems—some plants lean or flop over because they lack stability.
If you notice stems bending at the base or struggling to stand upright, your bulbs may not be anchored deeply enough. The fix? Replant them at the correct depth and gently firm the soil around them to eliminate air pockets.
On the flip side, planting too deep can suffocate your gladiolus bulbs. When buried beyond 6-7 inches, they may not get enough oxygen or sunlight to develop properly. This often results in stunted growth or even rot if the soil stays too wet.
If you suspect over-deep planting, carefully dig up the bulbs, trim any soft or mushy parts, and replant them at the ideal depth. Always ensure the soil around them is loose and well-draining to prevent future issues.
Another common issue is uneven planting depth across your garden bed. Even a slight variation—like one bulb planted at 5 inches and another at 7 inches—can cause inconsistent growth. To avoid this, use a leveling tool or even a straight piece of wood to create a flat surface before planting.
This ensures all bulbs sit at the same depth, promoting uniform growth and blooming. Think of it like setting a foundation for a building—consistency is key!
Don’t forget to check for soil compaction after planting. If the soil around your bulbs is too dense, it can restrict root growth and lead to weak stems. To fix this, gently loosen the soil with your fingers or a small hand fork after planting.
Adding a layer of organic mulch (like straw or shredded leaves) can also help maintain even moisture and protect bulbs from extreme temperatures. This small step can make a big difference in your gladiolus’ overall health.
Finally, if your gladiolus plants are struggling with rot or fungal issues, revisit your planting depth and soil conditions. Overly wet soil from planting too deep or poor drainage can create the perfect environment for rot.
Amend your soil with compost or perlite to improve drainage, and consider planting in raised beds if your garden soil is particularly heavy. With these adjustments, your gladiolus should thrive and reward you with stunning, vibrant blooms all season long. 🌸