
Planting
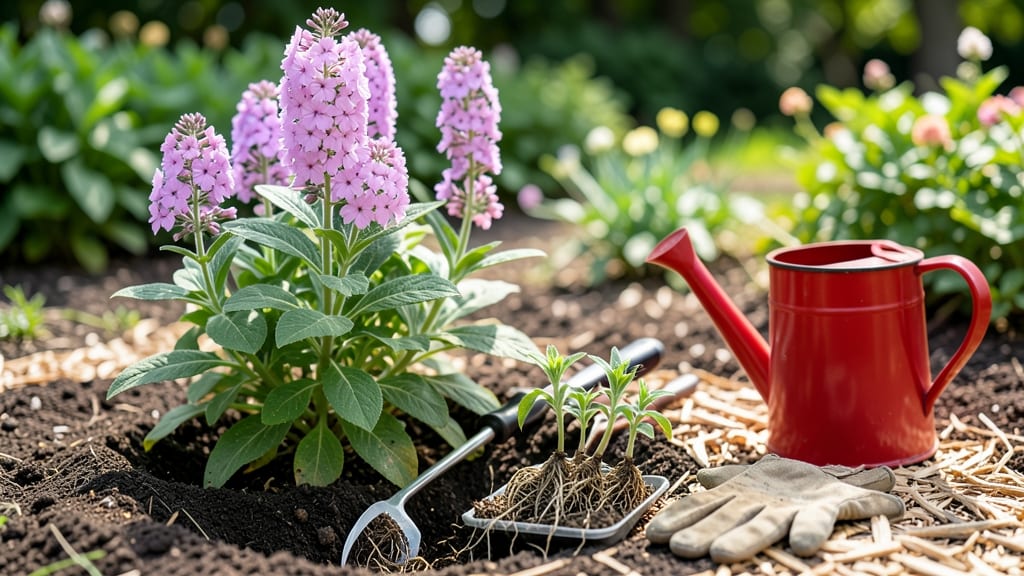
This phlox planting guide transforms your garden into a nonstop color show from early summer through fall—with almost no fuss once established. 🌸 The secret lies in mimicking their natural woodland edges: rich, well-draining soil, morning sun and afternoon shade, and a spot where they won’t compete with aggressive neighbors.
Start with moist but not soggy soil—phlox hates soggy roots—and mix in compost for that first flush of blooms. Space plants 12-18 inches apart for good airflow (crowding invites powdery mildew), and water deeply once a week after planting.
Fertilize lightly in spring with a balanced 10-10-10 mix—too much nitrogen means leaves over flowers. By midsummer, you’ll have clusters of blooms that attract butterflies and hummingbirds.
Prune back one-third after the first flush to encourage a second round of flowers, and mulch heavily in fall to protect roots from freeze-thaw cycles.
Whether in containers (use well-draining pots) or garden beds, phlox thrives with minimal care—just avoid overwatering and they’ll reward you with season-long beauty with almost no effort.
📚 In This Guide
- What you need
- Instructions
- Tips and common mistakes
- Wrapping up and next steps
What you need
- ● Phlox plants: Choose between garden phlox (perennial) or annual phlox. Opt for 3-5 plants per cluster for fuller blooms.
- ● Well-draining potting mix: 1-2 bags (50 lbs each) of high-quality garden soil mixed with compost (20-30%) for nutrients.
- ● Organic fertilizer: Balanced 10-10-10 or slow-release granules (1 lb per 10 sq ft).
- ● Mulch: 2-3 inches of organic mulch (e.g., shredded bark or straw) to retain moisture.
- ● Garden trowel or shovel (for planting and soil prep).
- ● Gloves (to protect your hands from thorns or rough soil).
- ● Watering can or hose with a gentle spray nozzle (phlox dislikes soggy roots!).
- ● Pruners (for trimming dead blooms or shaping plants).
- ● Measuring tape or ruler (to space plants 12-24 inches apart).
- ● Stakes or cages (if growing tall varieties like Panicle Phlox for support).
- ● Slow-release fertilizer spikes (for low-maintenance feeding).
- ● Drip irrigation system (to automate watering in hot climates).
- ● Plant food with phosphorus (to boost blooming, like 5-10-10).
How to plant phlox for season-long blooms
Here's the straightforward method I've used for years to get vibrant phlox that thrives with almost no fuss.
🌱 Step 1: Choose the Right Location and Prepare the Soil
Phlox thrives in full sun to partial shade—at least 6 hours of direct sunlight daily for best blooms. I always pick a spot with morning sun and afternoon shade to prevent afternoon wilting. The soil should be well-draining but moisture-retentive, so if your yard has heavy clay, amend it with 2-3 inches of compost mixed into the top 12 inches of soil.
Test your soil's pH—phlox prefers 6.0 to 7.0. If yours is too acidic, sprinkle lime lightly over the area a month before planting. Avoid fresh manure or high-nitrogen fertilizers, which encourage leafy growth over flowers. Instead, work in balanced 10-10-10 fertilizer at planting time for steady nutrition.
🌿 Step 2: Plant Bare-Root or Container-Grown Phlox Correctly
For bare-root phlox, soak the roots in lukewarm water for 2-3 hours before planting to rehydrate them. Dig holes twice as wide as the root ball but no deeper—phlox roots spread horizontally, not vertically. Space plants 18-24 inches apart for garden phlox or 12 inches apart for border phlox to allow airflow and reduce disease risk.
If using container-grown phlox, gently remove the plant from its pot and loosen the root ball at the edges. Place it in the hole so the top of the root ball sits just below soil level—burying the crown too deeply causes rot, while planting too high leads to weak stems. Backfill with native soil mixed with compost, tamping lightly to eliminate air pockets.
💧 Step 3: Water Deeply and Mulch for Moisture Retention
Water deeply right after planting to settle the soil and eliminate air pockets around the roots. Aim for 1-1.5 inches of water per week, either from rainfall or irrigation, especially during the first 4-6 weeks while roots establish. Phlox is drought-tolerant once established, but young plants need consistent moisture to thrive.
Apply 2-3 inches of mulch (like shredded bark or straw) around each plant, keeping it 2 inches away from the stem to prevent rot. Mulch conserves moisture, regulates soil temperature, and suppresses weeds—critical for phlox's shallow root system. Replenish mulch annually in early spring to maintain its effectiveness.
☀️ Step 4: Deadhead and Fertilize for Prolonged Blooms
Deadhead spent blooms every 2-3 weeks by snipping stems just above a set of leaves with clean pruners. This encourages continuous flowering and prevents the plant from setting seed, which diverts energy away from new blooms. I always wear gloves—phlox can be sticky from nectar, and the sap may irritate sensitive skin.
Apply a low-nitrogen, high-phosphorus fertilizer (like 5-10-10) in early spring and again after the first flush of blooms to support flower production. Avoid high-nitrogen feeds, which promote lush foliage at the expense of blooms. Water deeply after fertilizing to help nutrients penetrate the root zone.
✂️ Step 5: Prune and Prepare for Winter Dormancy
After the first hard frost blackens the foliage, cut back stems to 2-3 inches above the ground using sterilized pruners. This removes dead growth and prevents disease overwintering. I wait until late fall to prune—early cuts expose tender new growth to frost damage.
For perennial phlox, add a 2-inch layer of mulch over the crown to insulate roots during winter. In USDA Zones 3-5, where winters are harsh, consider covering plants with burlap or straw during extreme cold snaps. Phlox is hardy, but young plants benefit from extra protection their first winter.
Tips & tricks for perfect phlox planting
Here's what nobody tells you about planting phlox that makes all the difference between a garden bed that looks good and one that truly thrives.
Sunlight Strategy: That 6 hours of direct sunlight is non-negotiable for vibrant blooms, but here's the thing: morning sun with afternoon shade is ideal. I've seen phlox in full afternoon sun wilt dramatically by late afternoon—it's like they're getting sunburned. If your garden only gets afternoon sun, consider planting phlox near a building or fence that provides shade during those critical hours.
Soil Science: The 2-3 inches of compost mixed into the top 12 inches of soil is crucial, but don't just dump it in. Work it thoroughly into the existing soil to create a uniform growing medium. I like to use a garden fork to loosen the soil first, then mix in the compost. This prevents pockets of rich soil that can lead to uneven growth. For heavy clay soils, you might need to go even deeper—up to 18 inches—to ensure proper drainage.
Root Rehydration: That 2-3 hour soak for bare-root phlox might seem excessive, but trust me on this. I learned this the hard way after planting roots that were still crispy and brittle. The lukewarm water should be just warm enough to feel comfortable to your hand—hot water can actually damage the roots. Change the water after the first hour to prevent it from cooling and becoming stagnant.
Mulch Mastery: The 2-3 inches of mulch around your phlox isn't just for show—it's a game-changer for moisture retention and temperature regulation. I've found that straw mulch breaks down more slowly than bark, which means it lasts longer and provides more consistent protection. Just remember to keep it 2 inches away from the stem to prevent rot. In hot climates, you might want to add an extra inch or two during peak summer months.
Pro Tips for Phlox Planting Guide
- Here's what nobody tells you about planting phlox that makes all the difference between a garden bed that looks good ...
- Sunlight Strategy: That 6 hours of direct sunlight is non-negotiable for vibrant blooms, but here's the thing: mornin...
- Soil Science: The 2-3 inches of compost mixed into the top 12 inches of soil is crucial, but don't just dump it in. W...
Frequently asked questions
Got questions about growing phlox? You’re not alone!
Here are some of the most common concerns—plus quick, practical answers to help you cultivate vibrant blooms with confidence.
When is the best time to plant phlox?
For spring-blooming phlox, plant in early spring (as soon as the soil is workable). Summer-blooming phlox thrives when planted in late spring or early summer (after the last frost). This timing ensures roots establish before extreme heat or cold. Pro tip: Container-grown phlox can be planted year-round in mild climates, but avoid freezing temps!
How long does it take for phlox to bloom after planting?
Patience pays off! Most phlox varieties take 6–8 weeks to establish roots and 8–12 weeks to flower after planting. Perennial phlox may take 1–2 years to reach peak blooming glory. Consistent moisture and sunlight speed up the process—think of it as a slow-motion fireworks show!
What pests or diseases should I watch for with phlox?
Phlox is generally low-maintenance, but keep an eye out for:
- Japanese beetles (skeletonize leaves)—handpick or use neem oil.
- Powdery mildew (white dust on leaves)—improve airflow and spray with baking soda solution (1 tsp per quart of water).
- Rust fungus (orange spots)—remove infected foliage and avoid overhead watering.
Can I grow phlox in containers, or is it only for gardens?
Phlox thrives in containers—just choose a pot with drainage holes and a minimum 12-inch depth. Use a light, well-draining potting mix and fertilize monthly during the growing season. Dwarf varieties like ‘David’ or ‘Lipstick’ are perfect for patios or balconies!
How do I deadhead phlox to encourage more blooms?
Deadheading extends the blooming season and prevents seed formation. Simply pinch or snip spent flowers just above the first set of healthy leaves (or the next flower bud). For perennial phlox, do this throughout the summer—but leave some blooms if you want seeds for next year’s birds or natural reseeding!
Wrapping up and next steps
Ready to transform your garden into a vibrant, low-maintenance paradise? 🌸 With just a few simple steps—choosing the right variety, prepping the soil, and giving your phlox the perfect spot—you’ll enjoy season-long blooms with minimal fuss.
Whether you’re a seasoned gardener or just starting, phlox is your ticket to effortless beauty.
Now that you’re armed with all the tips, grab your gloves and get planting! Need more inspiration? Check out our garden design ideas to pair your phlox with complementary plants and create a showstopping display. Happy gardening! 🌿