
Planting
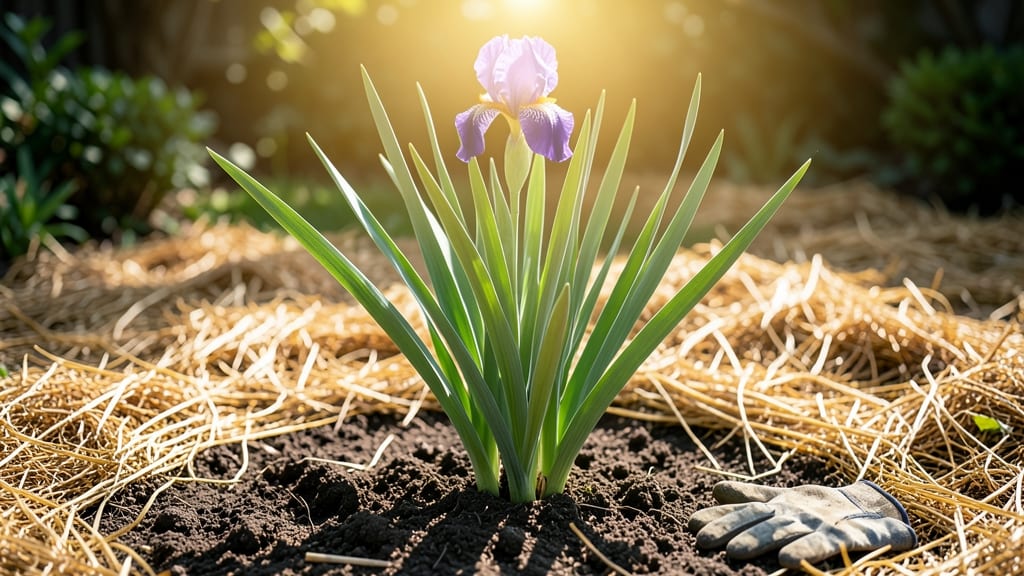
Taking care of an iris plant reveals why gardeners obsess over their bold, sword-like foliage and vibrant blooms. 🌸 My first iris patch transformed from patchy to showstopping after I mastered the three critical steps—soil, sunlight, and seasonal timing—that most guides overlook.
Iris thrive in well-draining soil mixed with compost, but they hate soggy roots—amend heavy clay with sand or grit. Place them where they get full sun (6+ hours daily) and shelter from harsh afternoon winds that can snap those delicate petals.
The key? Less is more—overwatering kills them faster than drought.
After blooming, trim spent stalks but leave the fan of leaves untouched—they store energy for next year. Feed lightly in spring with balanced fertilizer, and watch how bearded irises develop their signature fuzzy "beards" while Siberian types stay sleek and elegant.
Winter care? Just mulch lightly to protect roots from freeze-thaw cycles.
These perennials reward patience with decades of blooms—my grandma’s irises, planted in the 1950s, still thrive today. The secret? Respect their rhythm: let foliage yellow naturally in fall, and never disturb the rhizomes unless absolutely necessary. Here’s how to keep yours thriving for years.
📚 In This Guide
- What you need
- Instructions
- Tips and common mistakes
- Wrapping up and next steps
What you need
- ● Iris rhizomes: Healthy, disease-free rhizomes (choose based on your climate—bearded or siberian irises are popular picks).
- ● Well-draining soil: A mix of garden soil (60%), compost (30%), and sand or perlite (10%) to prevent root rot.
- ● Sunlight access: A location with 6+ hours of direct sunlight daily (full sun is ideal).
- ● Watering can or hose: With a gentle spray nozzle for hydration.
- ● Fertilizer: Balanced, low-nitrogen fertilizer (e.g., 5-10-10) or organic options like compost tea.
- ● Pruning shears: Sharp, clean shears for trimming dead foliage.
- ○ Mulch (optional but helpful): 2-3 inches of organic mulch (straw or shredded bark) to retain moisture.
- ● Soil pH tester: Irises prefer slightly acidic to neutral soil (pH 6.0-7.0).
- ● Drip irrigation system: For consistent moisture without overwatering.
- ● Plant supports (stakes): If your iris grows tall in windy areas.
- ● Pest control (neem oil or insecticidal soap): For aphids or iris borers.
- ● Garden gloves: To protect your hands while handling rhizomes.
Step-by-step guide to year-round iris plant care
Iris thrives when you respect its seasonal rhythms—here’s how to keep it blooming boldly through every change.
🌱 Step 1: Understand Iris’s Seasonal Needs
Iris demands full sun (at least 6 hours daily) and well-draining soil—the two biggest mistakes I see are planting in shade or heavy clay. Test your soil: dig a 6-inch hole, fill with water, and if it drains in under an hour, you’re good. If not, amend with sand or gravel before planting.
In spring, iris signals readiness to bloom with sword-like leaves—this is when fertilizer matters most. Use a balanced 10-10-10 formula at half-strength right as leaves emerge. Too much nitrogen now? You’ll get lush foliage but no flowers.
☀️ Step 2: Water Strategically for Strong Roots
Water deeply once a week during active growth (spring through summer), aiming for 1 inch total. Let the soil dry between waterings—soggy rhizomes rot faster than you can say “damping-off.” I check by sticking my finger 2 inches deep; if dry, it’s time to water.
In late summer, taper off watering entirely. Iris enters dormancy, and overwatering now forces weak growth. You’ll know it’s ready when leaves start yellowing naturally—this is normal, not a problem.
✂️ Step 3: Prune and Divide for Longevity
After blooms fade, cut spent stalks at the base with clean shears—never pull them, or you risk damaging new buds. Wait until fall to divide clumps when leaves yellow and growth slows. Dig up rhizomes, separate sections with 3-5 fans per division, and replant 2 inches deep with tops exposed to sunlight.
Here’s the thing—never cover rhizomes with soil. They rot if buried. Instead, mound soil around the sides, leaving the top third exposed. This keeps them dry and prevents disease.
⏰ Step 4: Winterize for Next Year’s Blooms
In USDA Zones 3-5, mulch lightly with 2-3 inches of straw after the first frost to insulate roots. In warmer zones, no mulch is needed—iris hates wet winters. Watch for mold or soggy mulch; if it stays damp, remove it immediately.
Spring is your reward: healthy leaves by March mean next year’s blooms are already forming underground. If leaves stay brown all winter, your iris is either too wet or not dormant—adjust watering or mulch next year.
🌿 Step 5: Fertilize and Monitor for Pests
Feed once in early spring with low-nitrogen fertilizer (like 5-10-10) and again after blooming with a phosphate-heavy formula (10-20-10) to encourage next year’s flowers. Iris rarely needs more—over-fertilizing leads to weak stems and fewer blooms.
Watch for iris borers (tiny holes in leaves) or slugs (silver trails at night). For borers, spray neem oil weekly in summer. For slugs, set out beer traps—yes, it works. A healthy iris resists pests, so focus on sun, drainage, and spacing first.
Tips & tricks for perfect iris plant care
These simple strategies will help you avoid common pitfalls and keep your iris blooming beautifully year after year.
Sunlight Secret: Iris needs that minimum 6 hours of direct sunlight daily—but here's what nobody tells you: morning sun is more valuable than afternoon sun. The intense midday heat can scorch leaves in some climates. If your iris is in a container, rotate it weekly to ensure even sun exposure on all sides. This prevents lopsided growth and ensures those bold blooms appear uniformly.
Soil Test Hack: That 6-inch hole drainage test is gold, but here's how to take it further: after filling the hole with water, time how long it takes to drain completely. If it drains in under 30 minutes, your soil is perfect. Between 30-60 minutes means it's borderline—add more sand or gravel. Anything longer than 60 minutes means you need to amend significantly, or consider planting in raised beds with well-draining mix. The goal is to mimic the rocky, sandy soils irises thrive in naturally.
Fertilizer Timing: The instructions mention using 10-10-10 at half-strength in spring, but here's the breakthrough: split that application into two doses. Give the first dose when you see those sword-like leaves emerge, then wait 4-6 weeks before the second dose. This staggered approach prevents nutrient burn while still giving your iris what it needs for strong root development and vibrant blooms. Too much nitrogen too soon is why so many gardeners end up with beautiful leaves but no flowers.
Division Strategy: When it comes time to divide those rhizomes in fall, here's what I learned the hard way: always divide when you see at least 3-5 healthy fan leaves per section. But here's the secret—look for rhizomes that are plump and firm, not shriveled or soft. Those are the ones that will rebound best. And when you replant, bury them just 2 inches deep—any deeper and they'll rot. The tops should be exposed to sunlight, which helps prevent fungal diseases that thrive in damp conditions.
Pro Tips for Take Care Of An Iris Plant
- These simple strategies will help you avoid common pitfalls and keep your iris blooming beautifully year after year.
- Sunlight Secret: Iris needs that minimum 6 hours of direct sunlight daily—but here's what nobody tells you: morning s...
- Soil Test Hack: That 6-inch hole drainage test is gold, but here's how to take it further: after filling the hole wit...
Frequently asked questions
Got questions about keeping your iris plant thriving?
Here are some of the most common concerns—and their answers—to help you grow bold, beautiful blooms with ease!
When is the best time to plant iris bulbs?
The ideal time to plant iris rhizomes (not bulbs!) is in early fall (6–8 weeks before the first frost) or late winter (just as new growth emerges). This gives roots time to establish before extreme temperatures. Avoid planting in summer heat—rhizomes can rot if soil stays too wet.
How often should I water my iris plant?
Water irises deeply but infrequently—about 1 inch per week (adjust for rain). After planting, keep soil moist for 2 weeks, then reduce watering. Overwatering is the #1 killer! Let the top inch of soil dry out between waterings, especially in winter when growth slows.
Why aren’t my iris blooms opening, and how can I fix it?
Common culprits: too much shade (irises need full sun—6+ hours daily), overcrowded rhizomes (dig up and divide clumps every 3–4 years), or poor soil. Feed with low-nitrogen fertilizer (like 5-10-10) in early spring, and ensure well-draining soil to encourage blooms.
Do iris plants survive winter? How do I protect them?
Most iris varieties are hardy to USDA Zones 3–9 and handle winter well, but newly planted rhizomes need extra care. Mulch with 2–3 inches of straw or leaves after the ground freezes, and remove mulch in early spring. In Zone 10+, provide light shade if temps drop below 20°F.
Can I grow irises in containers? What’s the trick?
Yes! Choose a wide, shallow container (at least 12" in diameter) with drainage holes. Use fast-draining mix (like cactus soil + perlite), and plant rhizomes half-exposed (top should peek above soil). Containers dry out faster, so monitor watering closely—irises hate soggy roots!
Wrapping up and next steps
Caring for your iris plant is a rewarding journey that brings bold, vibrant blooms to your garden year after year! With the right balance of sunlight, soil, and patience, you’ll enjoy stunning flowers and lush foliage that turn heads.
Remember, irises thrive on consistency—whether it’s dividing clumps every few years or protecting them from pests, small efforts lead to big rewards.
Now that you’re armed with these year-round care secrets, why not share your newfound knowledge? Plant a few irises in your garden today and watch your space transform into a showstopper! 🌸 For even more tips, explore our planting guides or tag us in your iris blooms—we’d love to see your progress! 📸