Planting
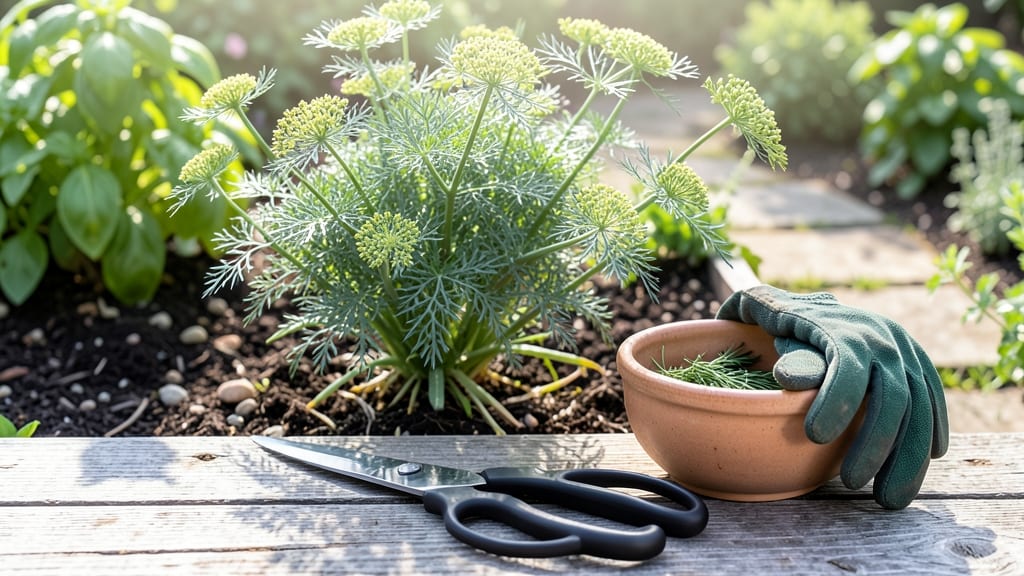
Cutting fresh dill from your plant is the secret to a bushier harvest that lasts all season long. ✂️ I used to snip leaves randomly until I learned the simple pruning technique that keeps my dill thriving—no more leggy stems or early burnout.
The key is timing, tools, and knowing exactly where to cut for maximum regrowth.
You only need clean pruning shears and 5 minutes to harvest properly. Start by cutting stems just above a set of leaves (never the topmost bud) to encourage branching. Avoid taking more than one-third of the plant at once, or you’ll shock it into flowering too soon.
The best time to harvest is in the morning after the dew dries, when oils are most concentrated.
What you’ll notice is a plant that stays compact and productive for weeks longer than unpruned dill. Each cut you make triggers new side shoots, so you end up with more harvestable stems over time.
Store your cuttings in a jar of water on the counter, and they’ll stay fresh for 7-10 days—longer than store-bought bunches.
This method works for both bush dill and fern-leaf varieties, and it’s foolproof even for beginners. Skip the guesswork and start harvesting like a pro—your next batch of soups and salads will thank you.
📚 In This Guide
- What you need
- Instructions
- Tips and common mistakes
- Wrapping up and next steps
What you need
- ● Fresh dill plant: A healthy, mature plant (preferably 6+ inches tall) with visible stems and leaves.
- ● Sharp pruning shears or clean kitchen scissors: Must be sterilized (rubbing alcohol or boiling water works) to prevent disease.
- ● Clean cutting surface: A tray, plate, or cutting board to collect stems and prevent contamination.
- ○ Water spray bottle (optional but helpful): For rinsing off dirt or pests before cutting.
- ● Gloves: Protect your hands from prickly stems or soil.
- ● Small container or jar: For storing harvested dill in water (like a bouquet) to extend freshness.
- ● Food processor or mortar & pestle: If you plan to chop dill immediately for recipes!
- ● Labeling tags: To mark pruned areas if you’re training the plant for bushier growth.
Step-by-step guide to pruning fresh dill for bushier growth
Harvesting dill correctly keeps your plant productive for months. Here’s how to trim it the right way.
✂️ Step 1: Identify the Right Stems to Cut
Wait until your dill plant has at least 6-8 inches of growth and 6-8 true leaves before harvesting. This ensures the plant has enough energy to regrow. Focus on cutting the outer stems first, leaving the inner, younger growth intact. These inner stems will branch out and produce more leaves after you trim.
Look for stems with fully formed flower buds—these are the most flavorful parts to harvest. If you see flower buds, cut them first, as allowing the plant to flower will cause it to go to seed and die back. Use clean, sharp scissors or pruning shears to avoid crushing the stems.
✂️ Step 2: Make Clean Cuts at the Right Spot
Cut the stems just above a set of leaves where the stem meets the main plant. This encourages new growth to sprout from that node. Avoid cutting too close to the base—leave at least 1-2 inches of stem above the soil to prevent damage to the plant’s core.
Make your cuts at a 45-degree angle to increase the surface area for water absorption and reduce the risk of rot. If you’re harvesting for seeds, wait until the seed heads turn brown and dry before cutting them off entirely. For fresh leaves and stems, you can trim multiple times throughout the growing season.
✂️ Step 3: Encourage Bushier Growth After Trimming
After harvesting, give your dill plant a light watering to help it recover. The plant will respond to the pruning by sending out new shoots from the nodes where you cut. Within 7-10 days, you should see fresh growth emerging from the inner stems.
To keep your dill bushy and productive, repeat the harvesting process every 2-3 weeks during the growing season. Avoid cutting more than one-third of the plant at a time, or you’ll stress the roots and slow down regrowth. If your dill starts to look leggy or sparse, it’s a sign it needs more frequent trimming.
☀️ Step 4: Maintain Light and Soil Conditions
Dill thrives in full sun (6-8 hours daily) and well-draining soil. After pruning, ensure your plant still gets plenty of sunlight to support new growth. If your dill is in a container, check the soil moisture—it should stay evenly moist but not soggy. Water at the base of the plant to avoid wetting the leaves, which can lead to fungal issues.
If you notice yellowing leaves after trimming, it could be a sign of overwatering or nutrient deficiency. Feed your dill with a balanced liquid fertilizer every 4-6 weeks to keep it healthy. With proper care, your dill plant can produce fresh harvests for 2-3 months or even longer in ideal conditions.
⏰ Step 5: Know When to Stop Harvesting
Dill’s life cycle ends when it goes to seed. If you see the plant producing yellow flowers and seed pods, it’s time to let it finish its cycle or pull it up. However, you can still harvest the leaves and stems right up until the plant bolts. Once the seeds mature, the flavor of the leaves becomes bitter, and the plant will eventually die back.
To extend your harvest, consider planting dill in succession every 2-3 weeks during the growing season. This ensures you always have fresh dill on hand for cooking, garnishes, and more. With the right pruning technique, your dill plant will stay productive and flavorful all season long.
Tips & tricks for pruning fresh dill
These simple techniques will transform your dill harvest from sporadic to abundant all season long.
Timing is Everything: The 6-8 hour daily sunlight requirement isn't just about growth—it's crucial for flavor development. I've found that harvesting right after morning watering (when leaves are fully hydrated) gives you the freshest, most vibrant stems. The 6-8 inch growth threshold isn't arbitrary—it's when the plant has stored enough energy in its roots to regenerate after pruning.
Precision Cutting Technique: That 45-degree angle isn't just for aesthetics—it's a horticultural best practice. The increased surface area helps prevent water from pooling at the cut, which dramatically reduces rot risk. I've seen beginner gardeners skip this and end up with mushy stems within days. For maximum regrowth, always cut just above a leaf node where you can see a tiny bump forming—this is where new shoots will emerge.
Regrowth Strategy: The 7-10 day window for new growth might seem long, but it's actually quite fast for herbaceous plants. To speed things up, I've started using a gentle foliar spray of diluted seaweed extract after pruning—it gives the plant a quick nutrient boost. Remember, those inner stems you're protecting will become your most productive harvest points over time, so treat them like the goldmine they are.
Seasonal Extension: The 2-3 week harvesting cycle works perfectly in most climates, but I've adapted this for cooler regions by using row covers to extend the season. When you notice your dill starting to bolt (those yellow flowers), don't panic—you can still harvest the leaves right up until the seed pods form. The flavor actually intensifies slightly during this transition period before becoming bitter.
Pro Tips for Cut Fresh Dill From Plant
- These simple techniques will transform your dill harvest from sporadic to abundant all season long.
- Timing is Everything: The 6-8 hour daily sunlight requirement isn't just about growth—it's crucial for flavor develop...
- Precision Cutting Technique: That 45-degree angle isn't just for aesthetics—it's a horticultural best practice. The i...
Frequently asked questions
Got questions about harvesting dill like a pro? You’re not alone—here are some of the most common ones to help you snag the freshest stems without stress!
1. How do I know when dill is ready to harvest?
Dill is ready when it reaches at least 6–8 inches tall and has 3–5 sets of leaves. The best time to harvest is in the morning after the dew dries, when oils are most concentrated. Avoid harvesting right after rain—wet stems can rot or attract pests.
2. Should I cut dill stems all the way to the base?
Nope! Cut stems 2–3 inches above the base to encourage bushier regrowth. Snipping at the base can stress the plant or leave it vulnerable to disease. Pro tip: Leave the lower leaves—they help the plant photosynthesize and recover faster.
3. How often can I harvest dill from the same plant?
With proper care, you can harvest dill every 2–3 weeks during its growing season (spring to fall). If you’re gentle and leave enough foliage, some varieties (like Mammoth) can produce for up to 6–8 weeks. Over-harvesting weakens the plant—balance is key!
4. What if my dill bolts or flowers too early?
Bolting (sending up flowers) usually happens in hot weather or short-day conditions. To delay it:
Once flowers appear, the leaves become bitter—pull and compost the plant to avoid reseeding (unless you want dill seeds!).
5. Can I use dill from the plant right away, or does it need to dry?
Freshly cut dill is best used immediately in recipes (think fish, soups, or yogurt sauces!). For storage:
- Refrigerator: Wrap stems in a damp paper towel and store in a bag for 5–7 days.
- Freezing: Chop leaves and freeze in ice cube trays with water or oil for easy use later.
- Drying: Bundle stems and hang upside down in a dark, dry place for 1–2 weeks.
Wrapping up and next steps
Cutting fresh dill from your plant isn’t just about harvesting—it’s about encouraging lush, long-lasting growth! With the right tools, timing, and technique, you’ll enjoy a bountiful harvest all season long.
Now that you’re armed with these tips, go ahead and prune with confidence—your kitchen (and your dill plant) will thank you!
Ready to put your skills to the test? Start by harvesting a small bunch today and experiment with different recipes—soups, salads, or pickles—where fresh dill shines brightest. Happy gardening! 🌿✨