
Planting
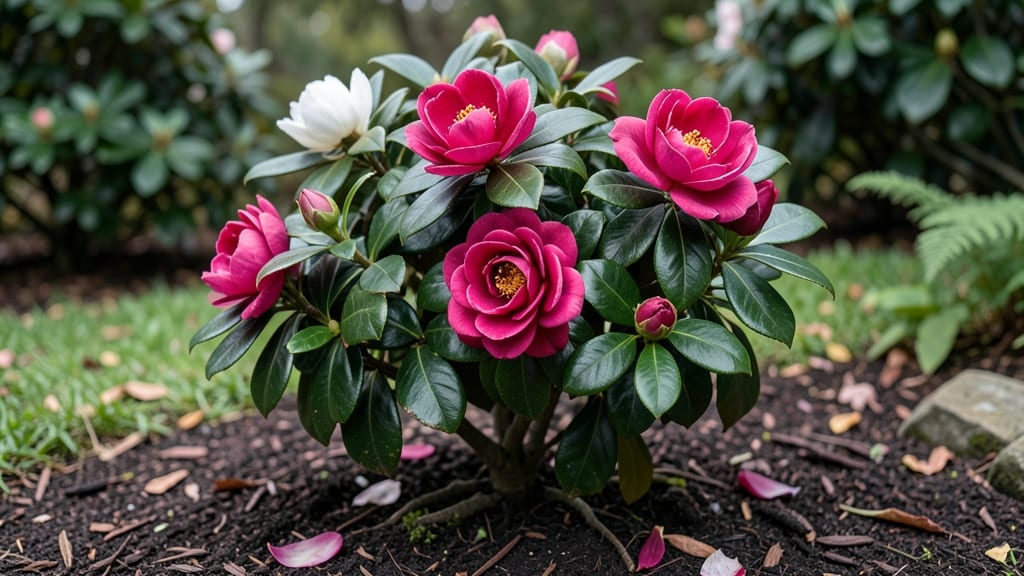
Camellia japonica thrives in zones 7–9, but I’ve grown them successfully in zone 6 with the right tricks—like mulching and microclimates. 🌿 The key isn’t just the zone number but how you protect them from winter’s harshest moments.
Many assume these plants can’t handle frost, but with proper care, they’ll reward you with glossy blooms for decades.
Start by choosing cold-hardy varieties like ‘Winter’s Star’ or ‘Yuletide,’ bred to handle dips below freezing. Plant them in spots with afternoon shade and shelter from north winds—think near fences or south-facing walls.
A thick layer of mulch (3–4 inches) insulates roots, while wrapping the plant in burlap in extreme cold adds extra defense. My zone 6 camellias have survived winters down to 10°F with this method.
By spring, you’ll see fresh growth pushing through, and those iconic blooms will appear earlier than expected. The secret is consistent moisture—camellias hate soggy soil but need steady watering during dry spells.
With patience, your plant will establish deep roots, making it more resilient each year. The payoff? Stunning flowers from late fall through winter, when most gardens are dormant.
For inland gardeners, microclimates are everything—even a sunny patio can work if it’s sheltered. Coastal areas? You’re golden—humidity and milder winters make growing camellias almost effortless. The goal is to mimic their native habitat: shade, moisture, and protection from freezing winds.
Once you master these basics, your camellia will thrive far beyond its official zone limits.
📚 In This Guide
- What you need
- Instructions
- Tips and common mistakes
- Wrapping up and next steps
What you need
- ● Camellia japonica plants: Choose cold-hardy varieties like 'Winter’s Star', 'Snowball', or 'Winter’s Dream' (USDA Zones 7-9). Purchase 1-3 mature plants (3-5 ft tall) from a reputable nursery.
- ● Well-draining soil: 5+ cubic yards of a mix of peat moss, perlite, and acidic compost (pH 5.0-6.0). Test soil pH with a kit before planting.
- ● Organic mulch: 3-4 inches of pine bark or wood chips (avoid cedar—it’s toxic). Cover the root zone to insulate against frost.
- ● Slow-release fertilizer: 1 lb of acid-loving plant fertilizer (e.g., 8-3-9 or 10-6-4 with micronutrients). Apply in early spring.
- ● Support stakes: 3-4 bamboo or metal stakes (5-6 ft tall) per plant for wind/ice protection.
- ● Garden tools: Trowel, pruning shears, and a shovel with a sharp edge for digging.
- ● Measuring tape or ruler (to ensure proper spacing: 6-10 ft between plants).
- ● Garden hose or watering can with a rain shower attachment for deep watering.
- ○ Thermometer (optional but helpful): A soil thermometer to monitor frost risks in Zones 7-8.
- ● Sunlight: Partial shade (morning sun, afternoon shade)—avoid harsh afternoon rays in hot zones.
- ● Water source: Access to consistent moisture (camellias hate drought).
- ● Frost protection plan: Burlap wraps or frost blankets for young plants in Zones 7-8 during sudden cold snaps.
How to select and care for cold-hardy camellia japonica varieties
Here’s the straightforward way to choose frost-tolerant camellias that thrive in cooler climates.
🌿 Step 1: Identify Your Zone and Best Varieties
Camellias thrive in USDA Zones 7-9, but some cold-hardy varieties extend survival into Zone 6 with proper care. Check your zone first—if you're in Zone 7, look for 'Winter’s Star', 'Winter’s Snow', or 'Winter’s Beauty'. These varieties handle 10-15°F without leaf damage, though buds may scorch below 5°F. For Zone 6, 'Winter’s Star' is your best bet, but expect some bud loss in harsh winters.
Real talk: even cold-hardy camellias need winter protection. I’ve seen 'Winter’s Snow' survive 10°F in Zone 7, but it’s the spring growth that tells the real story—healthy foliage means the roots survived. Avoid varieties like 'Desire' or 'Spring’s Promise' for colder zones; they’re stunning but only tolerate 20°F before damage.
☀️ Step 2: Plant in the Right Spot for Winter Survival
Camellias need morning sun and afternoon shade to prevent leaf scorch in summer, but winter sun exposure matters too. Plant in a location with southeast or east-facing light—this gives them gentle winter sun without overheating roots. I’ve found that protected microclimates (near walls or fences) add 5-10°F of warmth, making a huge difference in Zone 6.
Dig a hole twice as wide as the root ball but no deeper—camellias hate soggy roots in winter. Amend the native soil with 3-4 inches of compost mixed into the bottom half of the hole. This improves drainage while retaining moisture, which is critical when winter thaws occur. Water deeply after planting to settle the soil around roots—you’ll see the soil surface firm up slightly.
❄️ Step 3: Protect Buds and Roots from Frost
Once temperatures drop below 25°F, it’s time to act. Wrap the canes and buds with frost cloth or burlap, securing it loosely so air can circulate. I’ve used Christmas lights (strung around the plant) to add 5-10°F of warmth on particularly cold nights—it’s a game-changer for bud survival. For roots, mound 4-6 inches of mulch (straw or shredded leaves) around the base, extending it 12 inches out from the trunk.
Don’t skip this step. I learned the hard way when a 20°F snap in Zone 7 stripped all buds from an unprotected 'Winter’s Beauty'. The plant lived, but the spring blooms were sparse. If your zone dips below 10°F, consider wrapping the entire plant in burlap and covering it with a clear plastic dome (like a large milk jug with the bottom cut out) to trap heat.
🌱 Step 4: Prune and Feed for Post-Winter Recovery
Wait until late winter or early spring (after the last frost) to prune. Remove dead, broken, or crossing branches first—this prevents disease. Then, trim back any frost-damaged growth to just above a healthy bud. You’ll know a branch is dead if it’s brown and brittle when bent; healthy wood bends slightly. I’ve found that light pruning (no more than 20% of the plant) encourages stronger regrowth.
Feed with acid-loving fertilizer (like 8-3-9 or 10-10-10) in early spring when new growth appears. Camellias need low pH soil (5.0-6.0)—test your soil and amend with sulfur or peat moss if needed. Over-fertilizing in winter stresses roots, so hold off until you see new shoots (usually by mid-March in most zones).
⏰ Step 5: Monitor and Adjust for Long-Term Frost Tolerance
After the first year, your camellia will show its true cold hardiness. If buds survive but leaves scorch in winter, it’s a sign of too much sun exposure—move it slightly or add a lattice screen for afternoon shade. If the plant struggles to rebloom, it may need more winter protection—next year, try double-layering frost cloth or adding extra mulch.
Here’s the thing—camellias improve with age. A 5-year-old plant in Zone 7 will handle 10°F better than a young one. Keep notes on bloom times, frost dates, and survival—this helps you adjust care year after year. If you’re in Zone 6, consider container growing with winter storage indoors; I’ve had 'Winter’s Star' rebloom beautifully after a cool, dark winter indoors.
Tips & tricks for cold-hardy camellia care
These practical tips will help you keep your camellias thriving even when winter temperatures drop.
Variety Selection Matters: When choosing cold-hardy varieties like 'Winter’s Star' or 'Winter’s Snow', pay attention to the specific temperature ratings. While these can handle 10-15°F without leaf damage, buds may still scorch below 5°F. For Zone 6 gardeners, 'Winter’s Star' is your best bet, but be prepared for some bud loss during extreme cold snaps. I've found that even the hardiest varieties benefit from extra protection when temperatures dip below 10°F—don't assume they're completely invincible.
Microclimate Magic: The difference between a thriving camellia and a struggling one often comes down to placement. Southeast or east-facing locations give your plant gentle winter sun without overheating the roots. I've seen protected microclimates near walls or fences add 5-10°F of warmth—this can mean the difference between bud survival and complete loss. If your yard has cold pockets, consider planting near a south-facing wall where winter sun can provide extra warmth.
Root Protection is Non-Negotiable: The 4-6 inches of mulch around your camellia's roots isn't just decoration—it's insulation. Extend that mulch 12 inches out from the trunk to protect the most vulnerable parts. I've had plants survive 10°F nights just fine, only to lose buds because the roots weren't properly insulated. For Zone 6 gardeners, consider adding an extra 2 inches of mulch during the coldest months—it's worth the effort to see those spring blooms.
Pruning Precision: When pruning in late winter, remember the 20% rule—never remove more than that. Light pruning encourages stronger regrowth, but aggressive cuts stress the plant. I've seen gardeners over-prune after winter damage, only to have their camellias produce fewer blooms that season. Always trim back to just above a healthy bud, and avoid cutting into old wood—this is where next year's flowers will form.
Pro Tips for Camellia Japonica Zone
- These practical tips will help you keep your camellias thriving even when winter temperatures drop.
- Variety Selection Matters: When choosing cold-hardy varieties like 'Winter’s Star' or 'Winter’s Snow', pay attention ...
- Microclimate Magic: The difference between a thriving camellia and a struggling one often comes down to placement. So...
Frequently asked questions
What USDA hardiness zones can Camellia japonica survive in?
Camellia japonica is typically hardy in USDA zones 7-9, but cold-hardy varieties (like ‘Winter’s Star’ or ‘Korean Hitachi’) can tolerate down to zone 6 with proper winter care. In colder zones, mulch heavily, wrap young plants, and choose grafted varieties for better resilience.
How do I protect my camellia from frost?
Use a breathable frost cloth or burlap wrap to shield plants, especially in zones 6-7. Water deeply before frost to reduce stress, and avoid pruning in winter—it can stimulate new growth that’s vulnerable to cold. For heavy snow, gently brush it off branches to prevent breakage.
Can I grow Camellia japonica in containers if I’m in zone 6?
Yes! Container-growing extends flexibility—move pots to a sheltered spot (like a garage or under eaves) when temps drop below 15°F (-9°C). Use a well-draining potting mix and a large pot (15+ gallons) to stabilize roots. Dwarf varieties like ‘Donation’ are ideal for pots.
Why are my camellia leaves turning yellow or brown?
Yellowing leaves often signal overwatering or poor drainage, while brown edges can mean underwatering or salt buildup (common in tap water). Check soil moisture—camellias prefer consistently moist (not soggy) soil. If leaves drop after blooming, it’s normal! But if it’s sudden or widespread, inspect for pests like scale or spider mites.
When is the best time to prune Camellia japonica?
Prune right after flowering (late spring) to shape the plant and remove dead wood. Avoid pruning in fall or winter—it can encourage tender growth that freezes. Use clean, sharp shears and make cuts just above a bud or branch collar. Never prune more than 1/3 of the plant at once!
Pro Tip:
For zone 6 gardeners, plant camellias near a south-facing wall to absorb reflected heat. Group plants together to create a "microclimate" that traps warmth. And if you’re unsure about your zone, use the USDA Plant Hardiness Zone Map for precision!
Wrapping up and next steps
Growing Camellia japonica in your garden is a rewarding journey—especially when you choose the right cold-hardy varieties for your USDA zone! Whether you're in Zone 7 or pushing the limits in Zone 6, these stunning bloomers thrive with proper care, from mulching and pruning to smart watering. 🌸
Ready to transform your landscape? Start by selecting a variety suited to your climate, then plant with confidence—your future floral masterpiece is just a few seasons away! For extra peace of mind, review our FAQs or consult a local nursery for tailored advice.