Planting
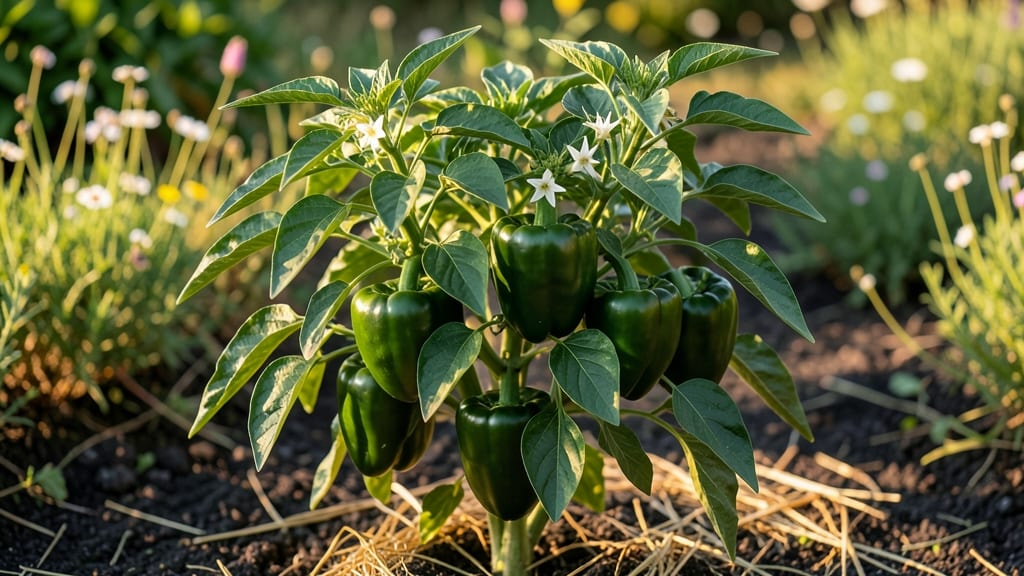
Growing the Bonnie Green bell pepper plant from seed to harvest in just 60 days feels like magic—especially when you're working with limited space or short seasons. 🌱 I've grown these peppers in containers on my sunny windowsill and in my garden, and they consistently deliver sweet, crisp fruit that makes store-bought look sad by comparison.
The secret lies in mimicking their tropical roots with warmth, consistent moisture, and plenty of sunlight.
These peppers thrive in well-draining soil with a pH between 6.0 and 6.8, so a mix of compost and potting soil works wonders. Start seeds indoors 8-10 weeks before your last frost, or buy sturdy transplants if you're short on time.
Bonnie Greens need at least 6-8 hours of sunlight daily, so a south-facing window or grow light is essential for indoor starters. Once planted outside, they'll reward you with glossy green leaves and eventually those plump, sweet peppers.
By following a simple watering routine—keeping soil consistently moist but not soggy—you'll avoid common issues like blossom end rot. A balanced fertilizer every 3-4 weeks keeps them productive, and companion plants like basil or marigolds help deter pests.
You'll know they're happy when they start flowering, and within 60 days, you'll be harvesting peppers that are perfect for stuffing, grilling, or snacking fresh.
Whether you're growing in a 5-gallon container or a raised bed, Bonnie Greens adapt easily. Just watch for aphids or spider mites and treat them early with neem oil.
The payoff? A steady supply of peppers that taste like summer, even when the weather doesn't cooperate. Ready to grow your own?
📚 In This Guide
- What you need
- Instructions
- Tips and common mistakes
- Wrapping up and next steps
What you need
- ● Bonnie Green Bell Pepper Seeds: 3–5 seeds (or 1–2 starter plants from a nursery). Look for organic, non-GMO seeds for the best results!
- ● Seed Starting Mix: 1–2 cups of high-quality, sterile potting mix (like FoxFarm Ocean Forest or Miracle-Gro Seed Starting Potting Soil). Avoid garden soil—it’s too dense for seedlings!
- ● Growing Containers: For Seedlings: 3–4 small pots (4–6 inches wide) or a seed tray with individual cells.
- ● For Transplanting: 1–2 larger pots (12–15 inches wide) or a garden bed with well-draining soil (if planting outdoors).
- ● Fertilizer: A balanced, water-soluble fertilizer (like 10-10-10) or an organic option such as fish emulsion. Start with a diluted dose (half-strength) to avoid shocking young plants.
- ● Watering Can or Spray Bottle: A fine-mist sprayer works best for seedlings to keep the soil moist without disturbing them.
- ● Gloves: A pair of gardening gloves to protect your hands from soil and thorns.
- ● Trowel or Small Shovel: For transplanting seedlings into larger pots or garden beds.
- ● Pruning Shears: To trim dead leaves or encourage bushier growth as the plant matures.
- ○ Support Stakes or Cage: Optional but helpful! A small tomato cage or stakes (18–24 inches tall) to support the plant as it grows.
- ● Grow Lights (Indoor Growing): A full-spectrum LED grow light (12–16 hours/day) if starting seeds indoors before the last frost.
- ○ pH Test Kit: Optional but useful for monitoring soil pH (ideal range: 6.0–6.8 for peppers).
- ● Mulch: Straw or shredded leaves to retain moisture and suppress weeds (especially for outdoor garden beds).
Step-by-step instructions for growing Bonnie green bell peppers
Here's how I turn Bonnie green bell pepper plants from tiny seedlings into productive garden stars in just two months.
🌱 Step 1: Start Seeds Indoors 8-10 Weeks Before Last Frost
Fill 2-3 inch deep seedling trays with moistened seed-starting mix (not garden soil) and press it down lightly. Plant 1-2 Bonnie green bell pepper seeds per cell at a depth of ¼ inch—about the diameter of the seed. Cover with a thin layer of mix and mist gently until evenly damp. You'll see the first true leaves appear in about 10-14 days at 70-80°F.
I use a seedling heat mat to keep soil warm—it speeds germination and prevents weak seedlings. Place the tray under a grow light immediately after planting, keeping it 2-3 inches above the soil. Without light, seedlings stretch toward any available source, creating weak stems that never recover. You'll know your light is right when seedlings grow thick stems and dark green leaves.
☀️ Step 2: Harden Off and Transplant After Frost
Two weeks before your last frost date, begin hardening off seedlings by placing them outside in a sheltered spot for 1-2 hours the first day. Gradually increase outdoor time by 1 hour daily until they can handle a full day outside. Bonnie peppers need 6-8 hours of direct sun daily, so choose a warm, sunny location.
Transplant after all danger of frost has passed and soil temperatures reach 60°F. Space plants 18-24 inches apart in rows 24-36 inches apart to allow for air circulation. Dig holes slightly deeper than the root ball and firm soil around the base. Water deeply right after planting to settle the soil and remove any air pockets.
💧 Step 3: Maintain Consistent Water and Fertility
Water Bonnie green bell peppers at the base 1 inch per week, keeping soil consistently moist but not soggy. I check moisture by sticking my finger 1 inch into the soil—if it feels dry, it's time to water. Overwatering leads to blossom-end rot, while underwatering causes peppers to turn bitter. Mulch with 2-3 inches of organic mulch to retain moisture and regulate soil temperature.
Fertilize every 2-3 weeks with a balanced 10-10-10 fertilizer or compost tea. Bonnie peppers are heavy feeders, so I mix a handful of compost into the soil at planting time and side-dress with additional compost mid-season. You'll see stronger growth and more productive plants when the soil is rich in nutrients.
✂️ Step 4: Prune and Support for Maximum Yield
Remove any suckers (side shoots) that form in the leaf axils to direct energy toward fruit production. Bonnie peppers benefit from pruning, but don't overdo it—remove only the largest suckers to maintain plant health. I also pinch off the first few blossoms to encourage stronger root and stem development before the main harvest begins.
Install cages or stakes at planting time to support the plants as they grow. Bonnie peppers can get top-heavy with fruit, and proper support prevents stems from snapping. Harvest peppers when they reach 3-4 inches long and are firm to the touch. Regular harvesting encourages more production—you'll see new flowers and fruit forming within days of picking.
🌿 Step 5: Protect and Extend the Harvest Season
Use row covers or cloches in early spring or late fall to extend the growing season. Bonnie peppers thrive in 70-85°F soil and air temperatures, so protect them from late frosts or early cold snaps. If temperatures drop below 55°F, the plants slow down and may stop producing.
To keep Bonnie peppers producing until frost, remove any diseased or damaged leaves immediately. I also rotate plants every 2-3 weeks to ensure even sun exposure on all sides. With proper care, you'll harvest peppers for 60-90 days after transplanting, depending on your climate. Store any excess peppers in the refrigerator for up to 2 weeks or freeze them for later use.
Tips & tricks for perfect Bonnie green bell pepper plants
Here's what nobody tells you about growing Bonnie peppers—these tricks make all the difference between a decent harvest and a bumper crop.
Seedling Heat Mat Game-Changer: That seedling heat mat isn't just a luxury—it's how you get those first true leaves in 10-14 days instead of waiting weeks. I've seen germination speed up by 3-5 days when using one, and the seedlings are stockier from the start. Keep it set to 70-80°F consistently, and you'll notice the difference immediately.
Grow Light Placement: The 2-3 inch distance above seedlings is critical—any closer and you'll scorch them, any farther and they'll stretch like they're reaching for the moon. I use a timer for 14-16 hours of light daily, and my seedlings develop those thick stems and dark green leaves without the leggy growth that leads to weak plants.
Harden Off Strategically: I start with just 1-2 hours the first day, but here's the secret: move them to a spot where they get morning sun and afternoon shade. This gradual transition prevents shock while still exposing them to the sun's intensity. By the time you're up to full sun, they'll be ready to handle it without wilting.
Post-Transplant Watering Hack: After transplanting when soil hits 60°F, I water deeply but only once—right after planting. Then I wait until the 1 inch soil check shows dryness. This prevents waterlogging while still giving roots time to establish before the next watering. The mulch you add later will help maintain that moisture balance perfectly.
Pro Tips for Bonnie Green Bell Pepper Plant
- Here's what nobody tells you about growing Bonnie peppers—these tricks make all the difference between a decent harve...
- Seedling Heat Mat Game-Changer: That seedling heat mat isn't just a luxury—it's how you get those first true leaves i...
- Grow Light Placement: The 2-3 inch distance above seedlings is critical—any closer and you'll scorch them, any farthe...
Frequently asked questions
Got questions about growing Bonnie Green Bell Pepper plants? You’re not alone! Here are answers to the most common queries to help you grow a thriving harvest with ease.
How long does it take for Bonnie Green Bell Pepper plants to produce peppers?
With proper care, Bonnie Green Bell Pepper plants typically start producing peppers 60–70 days after transplanting. Early blooms may appear in as little as 50 days, but full harvests peak in late summer or early fall, depending on your climate. Pro tip: Ensure consistent warmth (above 60°F/15°C) and plenty of sunlight to speed up fruiting!
Can Bonnie Green Bell Pepper plants survive frost?
No, these peppers are not frost-tolerant. Even a light frost can damage leaves or kill the plant. Start seeds indoors 8–10 weeks before the last frost and transplant after all danger of frost has passed. If your growing season is short, opt for container gardening to bring plants indoors before cold snaps.
Why aren’t my Bonnie Green Bell Pepper plants producing peppers?
Several factors can stunt pepper production, including:
- Insufficient sunlight (peppers need 6–8+ hours of direct sun daily).
- Temperature stress (below 60°F/15°C or above 90°F/32°C can halt blooming).
- Lack of pollination (hand-pollinate flowers with a paintbrush if bees are scarce).
- Over- or under-watering (keep soil consistently moist but well-drained).
Check your plants for these issues and adjust care accordingly!
Can I grow Bonnie Green Bell Peppers in containers?
These peppers thrive in 5-gallon containers or larger, making them perfect for patios, balconies, or small spaces. Use a well-draining potting mix and place containers in a sunny spot. Dwarf varieties (like Bonnie) are ideal for containers, as they stay compact. Just ensure the pot has drainage holes to prevent root rot.
What can I do if my Bonnie Green Bell Peppers turn bitter?
Bitterness in peppers often results from over-maturity or stress. Harvest peppers when they’re firm and fully green (about 3–4 inches long) for the best flavor. Avoid letting them stay on the plant too long, as they’ll turn red and develop a sharper taste. Pro tip: Water consistently and fertilize lightly with a balanced feed to keep plants happy and productive!
Wrapping up and next steps
Growing Bonnie Green Bell Pepper plants is a rewarding journey that brings vibrant color, flavor, and fresh produce to your table in just 60 days! With the right sunlight, soil, and care, you’ll enjoy a bountiful harvest—whether you’re a seasoned gardener or a curious beginner. 🌱
Now that you’re armed with tips and answers, it’s time to roll up your sleeves and plant. Start small, keep track of your progress, and soon you’ll be savoring homegrown peppers straight from your garden—or even sharing them with neighbors. Happy growing! 🌿